
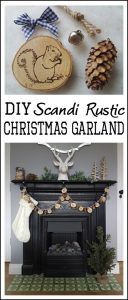
Guest Post from ‘The House That Will’: Scandi Rustic Christmas Garland
I have a very special guest post for my lovely readers, a really good friend of mine has started a beautiful new blog called ‘The House That Will’. Like myself, Norma is heavily into craft & DIY. Unfortunately, I don’t get much time to do any these days with a full time job and a house deposit to save up, but as soon as I get my house, the blog will be awash with craft projects, all my craft and cake decorating supplies are buried in boxes and I can’t get at them, our apartment rental is way too small to even swing a cat… so I would like to introduce you to this wonderful lady who kindly took the time to write this fabulous piece for The Creative Yoke. Herself and her Husband bought a beautiful house a few years ago and she is documenting the transformation in her blog, her sense of decor style and photography skills are truly worthy of a magazine. Please swing by her blog and social media platforms and give her a like if you get a chance.
Take it away Norms!! x
Hello everyone! I am delighted to have been asked by Sarah to write a guest post here at The Creative Yoke. Sarah and I met several years ago through our mutual love of all things vintage. For those of you who don’t know me yet, my name is Norma and I live in rural Co. Galway with my husband and border collie sheepdog where we are decorating our house from scratch by DIYing pretty much everything. And, yes, the dog also gets involved – we’ve nicknamed him ‘The Foreman’ because he’s always sniffing around our projects and checking up on what we’re doing! My little corner of the internet is a blog called The House that Will, where I share our journey of turning a house with “potential” into a home for the three of us. Do come and visit sometime!
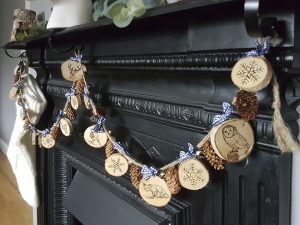
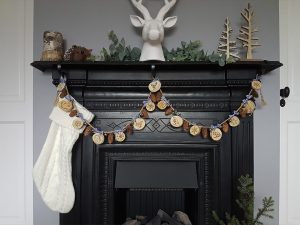
Over at The House that Will, Hubby and I are working on a makeover of our sitting room with what I’m calling a “rustic chic” design, and so I wanted to make a Christmas garland to work with that idea. Mine will hang on the fireplace, but a garland like this is very versatile: you could drape it along a staircase, over a kitchen dresser, or even across a headboard to add some festive cheer.
Supplies
- Jute twine
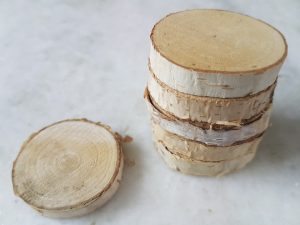
- Wood slices
- Small eye hooks
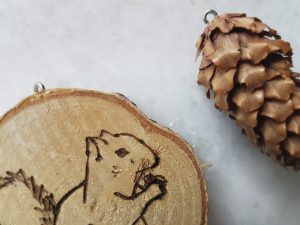
- Cones
- Bells
- Bows
- Large sewing needle & thread
- Pyrography pen/markers/acrylic paints
- Strong pin (I used a quilting pin with a plastic head)
- Pliers
- Craft knife
- Scissors
I purchased the cones and wood slices in Søstrene Grene, but you could collect these from nature yourself if you have access to somewhere suitable. Everything else I bought on ebay, but many craft stores would have similar items in stock, especially at this time of year – try Hickeys, Tiger, Vibes & Scribes, or the Art & Hobby Shop.

You can choose colours and trinkets to suit your own home and personal style: think mini baubles or tree ornaments, large beads, or woolly pom-poms. Your garland will keep for years to come – or you can make a tradition of creating a new one each year. Perhaps add to it over time like you would a charm bracelet. This is a project you can have a lot of fun with, and even the kids can get involved.
Step by Step
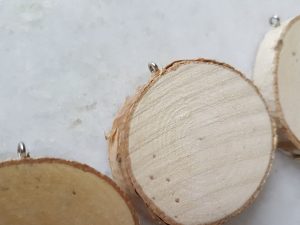
First, I sorted all of the wood slices to make a set that were all about the same size.
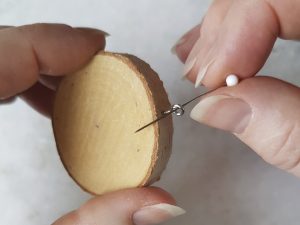
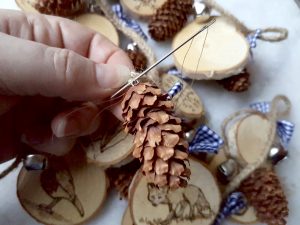
I started by attaching the eye hooks to the wood slices and cones. To do this, I used a quilting pin to make a pilot hole so that it was easier to hold the eye hooks in place.
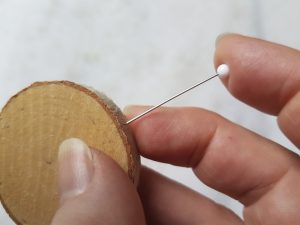
Using the pliers to grip the tiny hooks, I started to screw a hook into each wood slice and into the base of each cone.

Once the hook started to bite into the wood, I threaded the pin through the eye and twisted it to screw the hook into place.
With the cones, I occasionally needed to use the craft knife to trim the stalk to make a flat surface where I could attach the hook.
The eye hooks give a nice neat finish but, if you prefer, you could skip them altogether by drilling a hole in the wood slices and wrapping thread or wire around the cones.
Next it was time to decorate the wood slices. Now, I have to tell you: I suck at drawing. Like, really suck. Matchstick men are about all I can manage. So if you’re in the same boat, don’t panic! I opted to download some images from the internet, resize them on my computer, and print them onto a sheet of paper. Then I cut them out, laid them on top of the wood slices, and traced over them heavily with a ballpoint pen. This left enough of a mark that I had a good starting point, but didn’t leave any permanent clues about my lack of artistic skills! You could also use rubber stamps or stencils to create your designs.
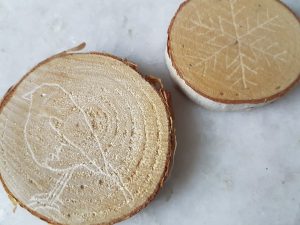
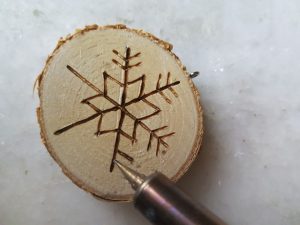
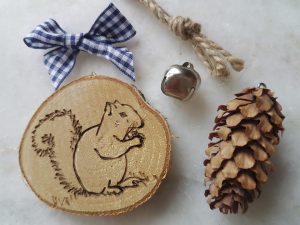
Then came the fun bit! I used a pyrography pen to decorate the wood slices. I chose images of snowflakes and native Irish animals and birds that can be seen at this time of year.
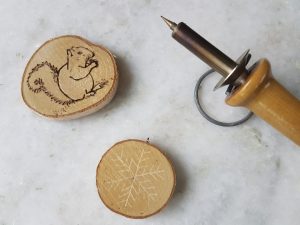
The pyrography pen burns the image into the wood. The slower you move the pen across the surface of the wood, the more it burns into it and the darker the colour. I used a fine nib for the outlines and detailed work, and a broader nib to add shadows and texture.
If you don’t have a pyrography pen, or if you’d like to get the kids involved, you could use markers or paints to decorate the wood instead.
All the wood and trinkets weigh quite a bit, so I braided the jute string to make it stronger. And I also prefer how it looks. I chose to braid 5 strands. If you are familiar with plaiting 3 strands, this works in a very similar way: lay out the 5 strands in a row and, alternating from left to right, bring the outermost strand into the centre.
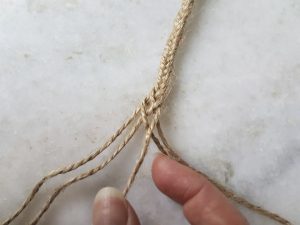
For a neat finish, it is important to keep the strands in a flattened row and in the correct order. After you’ve done the first few centimetres, I suggest adding a weight to the finished end or tying it to something secure so that you can pull against it as you work. Adding tension helps to keep the strands laid out flat.
Note: You will lose approx. 20% of the length by braiding it, so cut the strands about 25% longer than you need it to begin with.
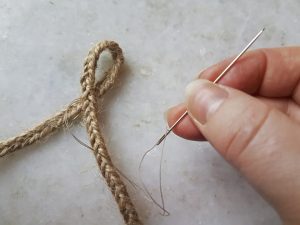
When I was finished braiding, I tied a knot at each end, then unravelled the loose threads and trimmed them to create a tassel.
Then I made a loop at each end and in the middle
so that I could hang the garland from a mantle clip (affiliate link).
If you want to skip this step, you could just use a separate piece of string or ribbon to tie up your garland.
Now I just had to assemble everything. I measured the garland and counted out all my trinkets so I could plan how to space it all out evenly. Then I stitched everything into place along the braided rope.
I really like sewing, but if it’s not for you, then you could just thread through each item and tie it into position along the garland.
I chose the blue ribbons for the garland to go with our sitting room decor, but life got busy with other things and we didn’t have time to install the fireplace yet. However, Hubby and I did build a fireplace in our bedroom some time ago, so the garland is going to live there for now.

My sincere thanks again to Sarah for inviting me to contribute to her lovely blog. Fun fact: I persuaded Sarah to begin blogging after seeing all her wonderful creations that she posted to Facebook. Then a couple of years later, she was the one who encouraged me to start a blog!
Many thanks for reading! If you you enjoyed this little project, do pop on over to The House that Will to see more. You will always find me elbow-deep in some project or other!


3 Comments
Karrie
Thanks for having Norma share this! THis is the best garland ever!! I think I might just have to make one of these ASAP!! Love it, love it, love it!!
Sarah Cooke-O'Neill
You’re very welcome Karrie! Norma’s very talented, isn’t she? ☺
Norma | The House that Will
Awww, thank you ladies! You’re too kind. xx
Karrie, if you do make one, please do share a pic!